API.AI & Google Assistant: Creating your first Conversation Agent
You : “Ok Google, how do we write our first action for Google Assistant?”
Me : Let’s start
Prerequisite : Sign up for Google Cloud Platform (GCP)
In case you have an existing GCP Account, you are good to go. If not, you should sign up for the same. GCP gives you a 2-month and $200 credit to get started and that is sufficient to learn tons about the platform. In fact, there is a Free-tier on GCP that in my opinion is the most generous that you can come across. Sign up here.
Overview and Purpose
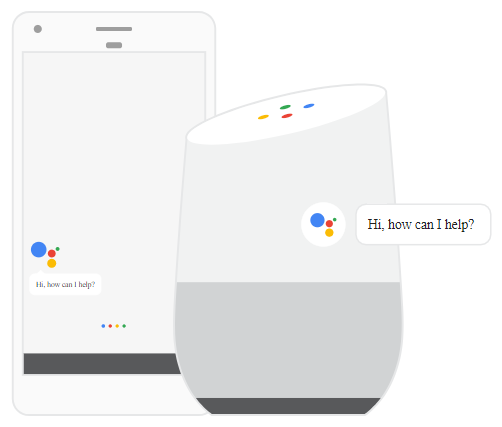
This hands-on lesson provides a step-by-step guide to creating a Feedback Agent using natural conversation. We shall use API.AI platform to write this Agent. We will learn how to use Google Actions Console to test and validate our Agents on multiple target surfaces like Google Home and a Phone. You can sign-in to API.AI with your Google account that you used to sign up for GCP.
Sample Conversation
Before we begin with API.AI, we can take a look at a sample conversation. It is important to model this, so that we have a reference conversation that we can start to mode.
The conversational flow that we shall come up with is given below, with a sample user, User1 and the Feedback Agent:
User initiates the conversation …
Feedback Agent: Hi! I am the Feedback Agent. Thank you for taking the time to give us feedback.
User1: I would like to leave some feedback.
Feedback Agent: Which city did you visit our Resort in?
User1: I went to your Mumbai resort.
Feedback Agent: How would you rate your experience on a scale of 1 to 5.
User1: I would rate it at 3.
Feedback Agent: Any specific comments or feedback, you would like to give us?
User1: The food was excellent. We found the entertainment activities to be a bit limited.
Feedback Agent: Thank You for your feedback. We appreciate you taking the time to give us feedback. Have a good day and hope you visit us again.
Building our Agent with API.AI
Follow the steps given below to build out the Feedback Agent.
Step 1 : Create the Agent
Sign in with your API.AI account. If this is your first time using API.AI, you will have no Agents configured. In the top-right, from the main menu, click on Create Agent as shown below:

This will bring up the Agent configuration screen, where you can define the Agent name, provide a useful description and more. The screen is shown below:

Provide the following information:
- Name for the Agent i.e. FeedbackAgent (no spaces in the name)
- Description as shown
- Select New Google Project or if you have signed up for Google Cloud Platform and have an existing project, select a specific Google project from the list shown.
- Click on SAVE.
You will then be led to the Intents screen but we can skip that for now. We will first define a few entities.
Step 2 : Create the Entities
In this step, we are going to model our entities. If you look at the sample conversation that we defined, we had to capture the rating (on a scale of 1 to 5) and the location of the resort.
Now, for our example, we will consider that the hotel has resorts at the following locations:
- Mumbai
- Delhi
- Kolkata
- Bengaluru
- Chennai
- Hyderabad
So, what we are going to do now is to define our location entity with valid values. And we shall do some interesting things i.e. define synonyms, such that if someone says Bangalore or Bengaluru, it means the same and so on for other cities too.
Let us create the resort-location entity as instructed below.
Go to Entities from the main menu. Click on CREATE ENTITY button. Give a name to the entity resort-location and create the entries as shown below, ensuring that the Define synonyms checkbox is selected.

Click on the SAVE button.
Create another entity called rating as shown below:

Remember to click the SAVE button.
You should now have the following list of entities:

Step 3 : Create the Intents
Click on the Intents option in the main menu. You should see the following Intents by default:

Click on the Default Welcome Intent. By default, this has an event configured for it, named WELCOME. This is automatically activated for multiple integrations like Google Home, etc.
You will see a list of standard Responses at the bottom. The Agent will randomly pick one up to respond here. You can opt to modify this message if you want.
One of the things we can do now is to remove all the standard responses and add the following text message, which we discussed in the sample conversation flow.
“Hi! I am the Feedback Agent. Thank you for taking the time to give us feedback. “
The Responses section should look like this:

Make sure that you SAVE the intent.
You can alternately start the training for your Agent. You can start typing the sentences that you would like this Intent to be kicked in and for which you would like the Agent to respond with the statement that we have configured. Go ahead and Type “Hi” and “Hello” in the User says field. The screenshot is shown below:

Remember to click the SAVE button.
You can also visit the Default Fallback Intent, which is executed when there is no statement that the platform is able to match to the existing intents.
The next thing that we are going to do now is to create our main intent i.e. the Report Feedback Intent.
Go ahead and click on adding a New Intent. This will bring up the New Intent screen. Start by giving a name to the Intent i.e. Feedback Intent.
We are now going to add a few sample utterances in the User says field. Type the following sentences, one after the other. After entering each statement, press Enter (Return).
- I would like to leave some feedback
- I think my rating is 5
- I visited the Mumbai location
You will notice that the application was able to extract out the rating and location entities that we created a while earlier and was able to map it to the entity names that we created (@rating and @resort-location).
Give a name to our action i.e. feedback.action
Reorder the Parameter list as shown below and do the following:
- Make both the parameters are required by selecting the REQUIRED option.
- Add a prompt to each of the parameters as given:
The intent page should look like the following at the moment:

We still need to add our comments parameter. Add another parameter by tapping on the “Enter name” row that you see right below the resort-location parameter. Give it the following details:
Click on SAVE.
Finally, in our Response Text, give the following text:
“Thank You for visiting our $resort-location resort and giving us a feedback rating of $rating. We appreciate you taking the time to give us feedback. Have a good day and hope you visit us again.”
Note the use of the variables $resort-location and $rating.
Click on SAVE again.
This completes the definition of the Intent.
Step 4 : Test our Agent
It is time now to start testing our Agent. In the Agent test Console on the right, where you see Try It Now field, you can test out the Agent by typing in sample utterances.
Test Case: Welcome Intent
Go ahead and type “Hello” in the Test Console. This should bring up a result as shown below:

You can see that it mapped it correctly to the Default Welcome Intent. The Response field shows that it picked up the Response that we had configured for the Agent.
Test Case : Give Feedback
Go ahead and type “I want to give feedback”. The Test Console for the Agent will correctly map it to the Feedback Intent as shown below. Note that it is able to also bring forward the next question to be asked i.e. what rating would the user like to give?.

Continue with the rest of the conversation. I say 5.

Then it asks me for the city that I visited the resort in? I answer with Chennai.

In the final step, I give some comments as shown below:

You can see that it completed the linear set of questions that we asked and summarized it in the response.
Things to note:
The final output in the Test console, shows us the Parameters and the values that you gave.
Click on the Show JSON link. In case, you integrate it with an external Webhook that needs to be invoked, then API.AI will invoke it with the request as shown. A sample with the request parameter names that are of interest to us is shown below:

Optional :
Keep training the Agent with additional statements that you would like it to handle in the “User Says” option for the Intent.
Visit the Training option in the main menu. Take a look at sample utterances and how it has mapped to the respective Intent. If you enter statements that it does not understand, it will come up as unmatched over here and you can assign it to specific intents if you want.
Step 5 : Publish your Agent (Web Demo)
We can now publish our Agent, so that we can give it out to people to test. This is not the same as publishing the Agent for everyone to access.
To enable the Web Demo, go to the Integrations page. One of the options visible is Web Demo as shown below.

Slide the button to ON. This will show the URL and a place where you can change the icon and description for your Agent.

Click on that URL to visit the Agent in Action (a sample run is shown below).

Step 6 : Integration with Google Home
In this final step, you can test out your Agent in the Google Home Simulator. To do that, we will have to go to the Integrations link again. API.AI provides integrations with many popular Messaging Platforms and Interfaces. You will notice that “Actions on Google” is available as one option. This is a unified mechanism to enable “Actions on Google”, which currently is enabled for Google Home but the same Action would work in the near future via the Google Assistant on other Google devices like Pixel phone and other Android phones that it will get rolled out to.
To enable the “Actions on Google” integration, select the option. This will bring up Actions on Google configuration dialog as shown below:

Click on Update Draft. This will update the Actions on Google details for your Agent and will display a message as shown below to proceed to the Actions on Google console via the Visit Console button.

Click on Visit Console button.
This will take you to the Actions for Google console, which is similar to the console that you expect when working with Google Cloud Platform. In fact, if you recollect in the first step when creating the agent, we asked that it create a new Google Cloud project. In fact it has done that as you can see in the top right hand corner of the console, as shown below:

Now, here is the cool thing about this console. It is a step by step process for you to set things in place for publishing your Agent for wider distribution and availability to everyone, including testing on your devices or the web based simulator.
The screen should look something like following:

You can see that we have completed Step 1 i.e. the Action has been added from the API.AI console that you were using to author your agent.
To test our agent on the web based simulator that Google provides, simply click on the TEST DRAFT button. It will bring up the simulator screen for your Agent as shown below:

It provides you instructions on what you can do i.e. Just follow it by typing or saying “Talk to my test app” and then it kicks in with the rest of the flow. A sample run is shown below:

You can also see the request / response JSON that are flowing for every conversation request / response and this will be very useful to understand what is going on and also for debugging later on, as you build in custom functionality via code.
Some of the advantages of this Testing console is:
- You can test out multiple versions of the Google Assistant Action. Currently, we just have draft but you can do test out for multiple versions.
- You can enable / disable testing as needed.
- You can choose a surface for testing to make sure that you have the optimum experience for each of these surfaces. This is very important.
- You can share the current version for testing / experience by clicking on the share link. This will add project team members to your Google Cloud Platform project and provide them viewership rights.
All of the above are available on the top right side of the console as shown below:

WEBHOOK FULFILLMENT
The example that you have seen so far is giving you a canned response that is returned from the Intent definition itself.
In the real world, once API.AI is done with its processing and you have collected all the information that you want, in our case, the feedback information i.e. rating, resort location and comments, you would want that data to be sent to your backend application. In other words, it would be great if the API.AI System was able to make a HTTP POST to your backend server, which could then record the data and give back the response to the API.AI conversation.
We can do that via the Webhook Fulfillment in API.AI. What we are going to do is the following:
- We proceed with the test agent in API.AI and collect all our information (rating, resort location and comments).
- At the last step, we would like that the call be made to our backend API i.e. HTTP POST.
- Our backend API Server will extract out the parameters (rating, resort location and comments) and print them (You can definitely do more with it, but you get the drift!) and return back a successful response back to API.AI.
Our Backend API Server
This hands-on exercise provides you with multiple backend API Server implementations, which you can use for your testing. Depending on your preference, we have the implementations available in the following languages:
- Python
- Node.js (JavaScript)
- Golang
The source code for each of the API Server implementations is available at the companion Github site. Go to the directory webhook implementations and pick your preferred language implementation.
As mentioned earlier, the JSON Request that will be sent to your webhook and specifically the one with the parameters is shown below (partial response):
So we need to extract out the parameters.
Note that we have to return back the response as a JSON in a specific format. This is documented in the API.AI documentation (https://docs.api.ai/docs/webhook#section-format-of-response-from-the-service) and we are following that.
Running our Backend API Server
We will be running the API Server locally and for that we will need that our local server is available publicly to the outside world. We shall use ngrok, which is a local tunneling software.
It works in the following manner:

To start our application and use ngrok to expose a publicly accessible endpoint for our server, we need to do the following:
- We start up the respective application (Python, Node.js or Golang). You should be familiar with starting up of the application. For e.g. $ go run or $ python or $ node and so on. The code runs the Server on port 5000.
- We start ngrok to expose a secure public tunnel on port 5000 via the following command:
- $ ngrok http 5000
This will start the ngrok utility and you will see an output similar to the following. It shows the http/https endpoints that it has exposed and where it tunnels the traffic to i.e. localhost running on port 5000. Now, all you need to do is use this Forwarding endpoint in the next section.
$ ngrok http 5000
ngrok by @inconshreveable
Session Status online
Version 2.1.18
Region United States (us)
Web Interface http://127.0.0.1:4040
Forwarding http://532f619b.ngrok.io -> localhost:5000
Forwarding https://532f619b.ngrok.io -> localhost:5000
Connections ttl opn rt1 rt5 p50 p90
0 0 0.00 0.00 0.00 0.00
Configuring the Webhook Fulfillment in API.AI
We need to now get back to the API.AI console. Assuming that you are logged in, go to the Fulfillment section from main menu.
This will bring up a screen as shown below:

Go ahead and enable it. This will ask you for the URL. Please copy the HTTPs URL that ngrok utility provided you and put that with the trailing /webhook since that the URL that our API server is listening on. A sample configuration is shown below:

Click on SAVE.
The next step is to modify the Intent to ensure that the Webhook Fulfillment is enabled. Go to the Intents list and then click on the Feedback Intent. Then navigate to the bottom and do the following (as the screen indicates):
- Remove the Text response that is currently there and replace it with an error message as shown below. This is the default message that will be delivered as the final response in case there is a problem with the Webhook fulfillment.
- Finally, go and select the Use Webhook option in the Fulfillment section as shown.
- Click on SAVE.

This completes the external Webhook Integration. You can test out the Agent again via the Agent Test Console. Just ensure that your local API server is running and that you have launched ngrok currently and used the correct Webhook URL.
AGENT PERSONALITY
You would have noticed that the conversation that we have created is not very personal or friendly. There are multiple ways in which you could have made it better. Think about the following points:
- If the user gave a feedback rating that less than or equal to 3, you might want to provide a different message and maybe provide a different response.
- You could possibly repeat or confirm the statements so that the feedback helps the reader to confirm if things are going fine.
- In a real system, you might want to even know the context of identifying the user, mentioning about the visit to the resort that they just had and then ask for feedback, first asking for permission.
The above points are just suggestions and the more you add personality to your Agent, the better the experience will be. For a detailed reference and best practices, head over to the Design site on Google.
SUMMARY
This hands-on guide covered how to create a simple and linear conversational flow via the Agent in API.AI. This is just a fraction of the features and complexity that you can build into your Agent. For more information, check out the excellent documentation available at the API.AI documentation page.
Our product development experts are eager to learn more about your project and deliver an experience your customers and stakeholders love.